> For the complete documentation index, see [llms.txt](https://extender.router.works/llms.txt). Markdown versions of documentation pages are available by appending `.md` to page URLs; this page is available as [Markdown](https://extender.router.works/ezr13t/firmware/update.md).
# Update
Performing the file-level backup, restore, reset, and firmware upgrade on the WiFi range extender.
## Backup & Restore
The EZR13T WiFi extender provides an easy way to backup and restore the previous configurations. Please back up your configurations before making changes to the extender.
### Backup
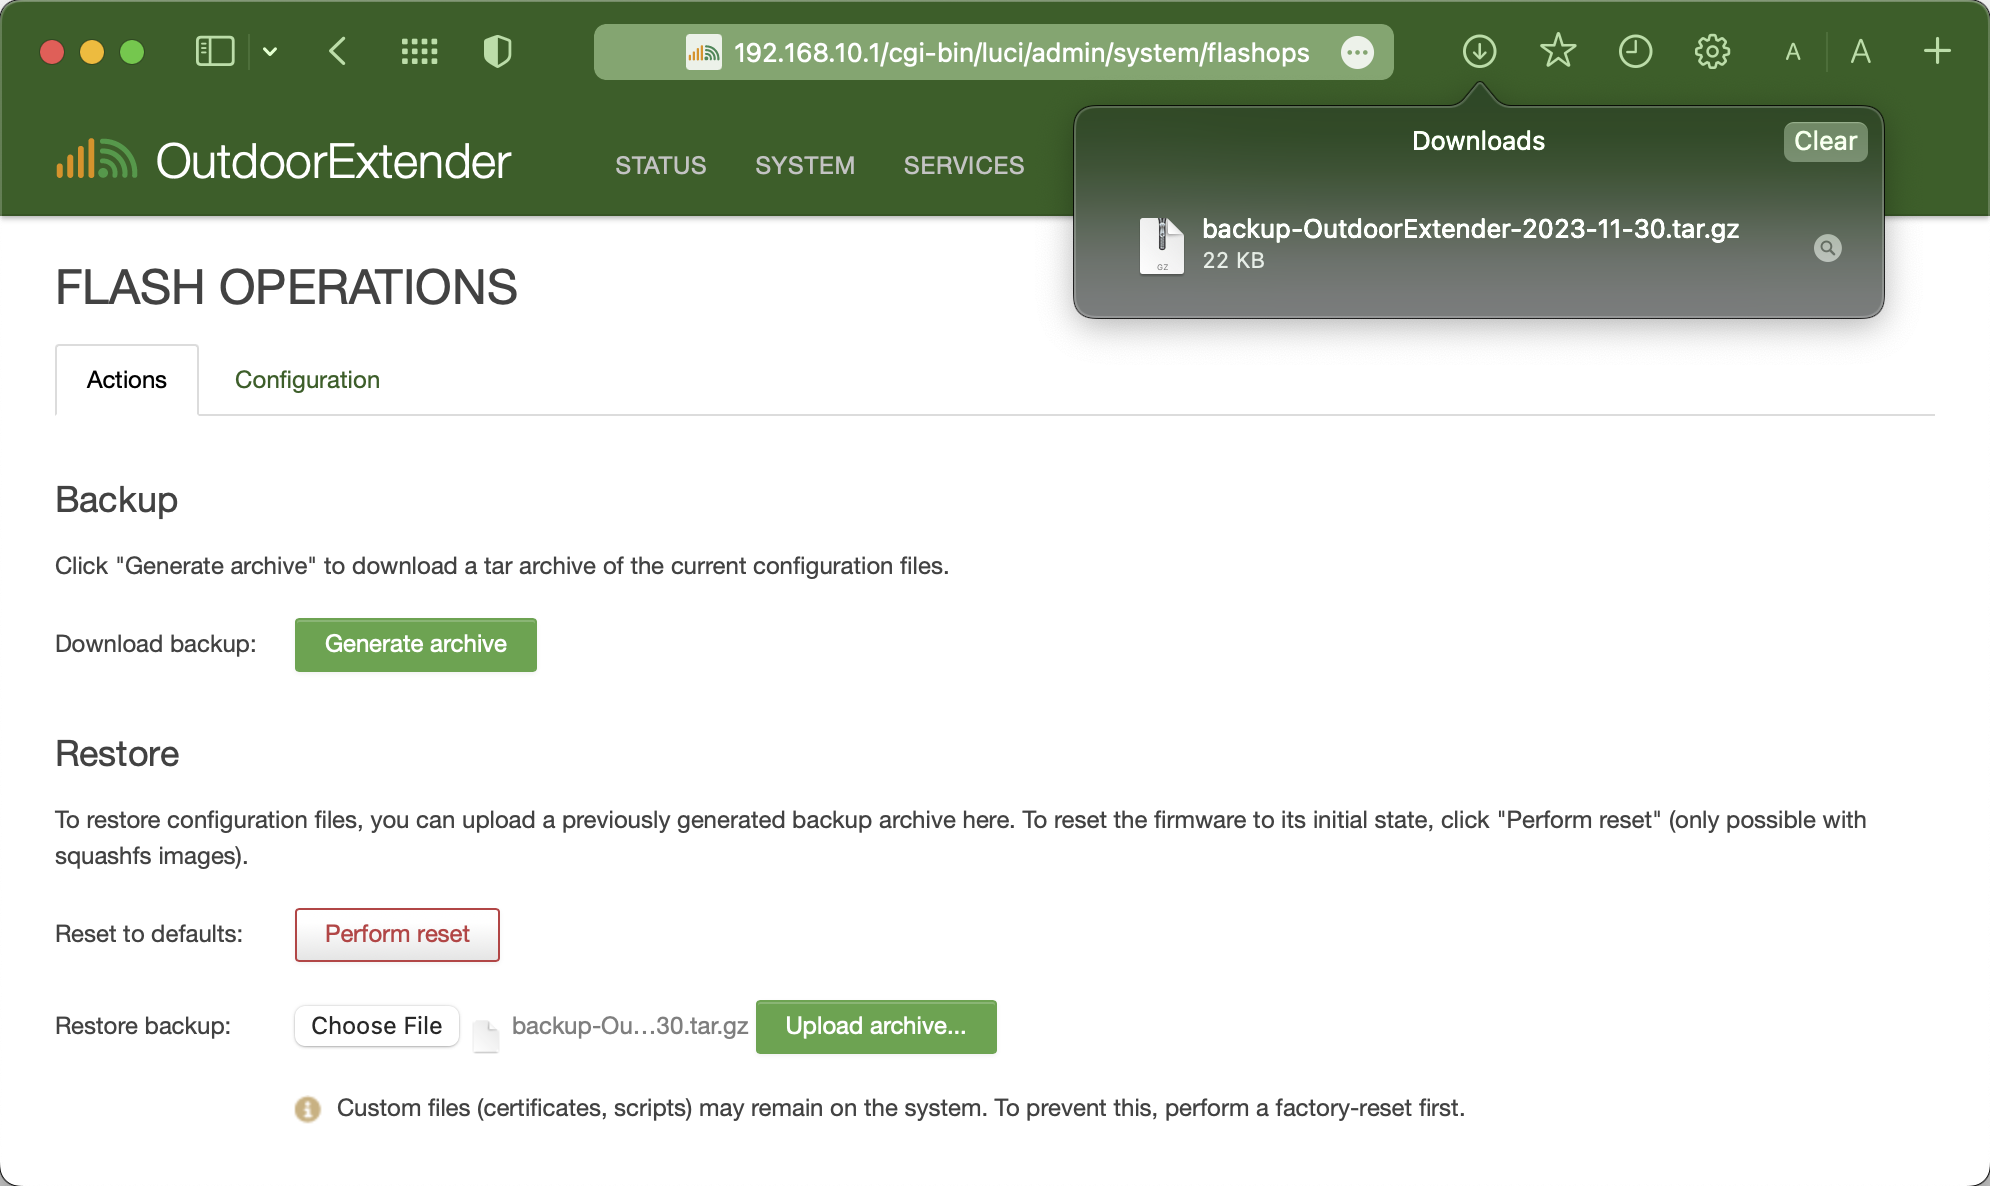
After accessing the admin, navigate to ***"System > Backup / Flash Firmware."***
Under the ***"Actions"*** tab, click the ***"Generate Archive"*** button to download the backup file of current extender configurations.
{% hint style="info" %}
Do not unzip the download archive file. Some web browsers automatically unzip the download file. Please verify if the file is in the format of ***\*.tar.gz***.
{% endhint %}
### Restore
To restore previously saved extender configurations, click the "***Choose File***" button to select the archive file. Then, click the "***Upload Archive***" button to upload the configuration file.
Do not turn off power while restoring the configuration file!
***
## Flash Firmware
A firmware upgrade will replace the entire current installation with a new version. Before upgrading the firmware, please download the backup file and the correct updated firmware on a computer. You can contact our sales team to get the latest firmware.
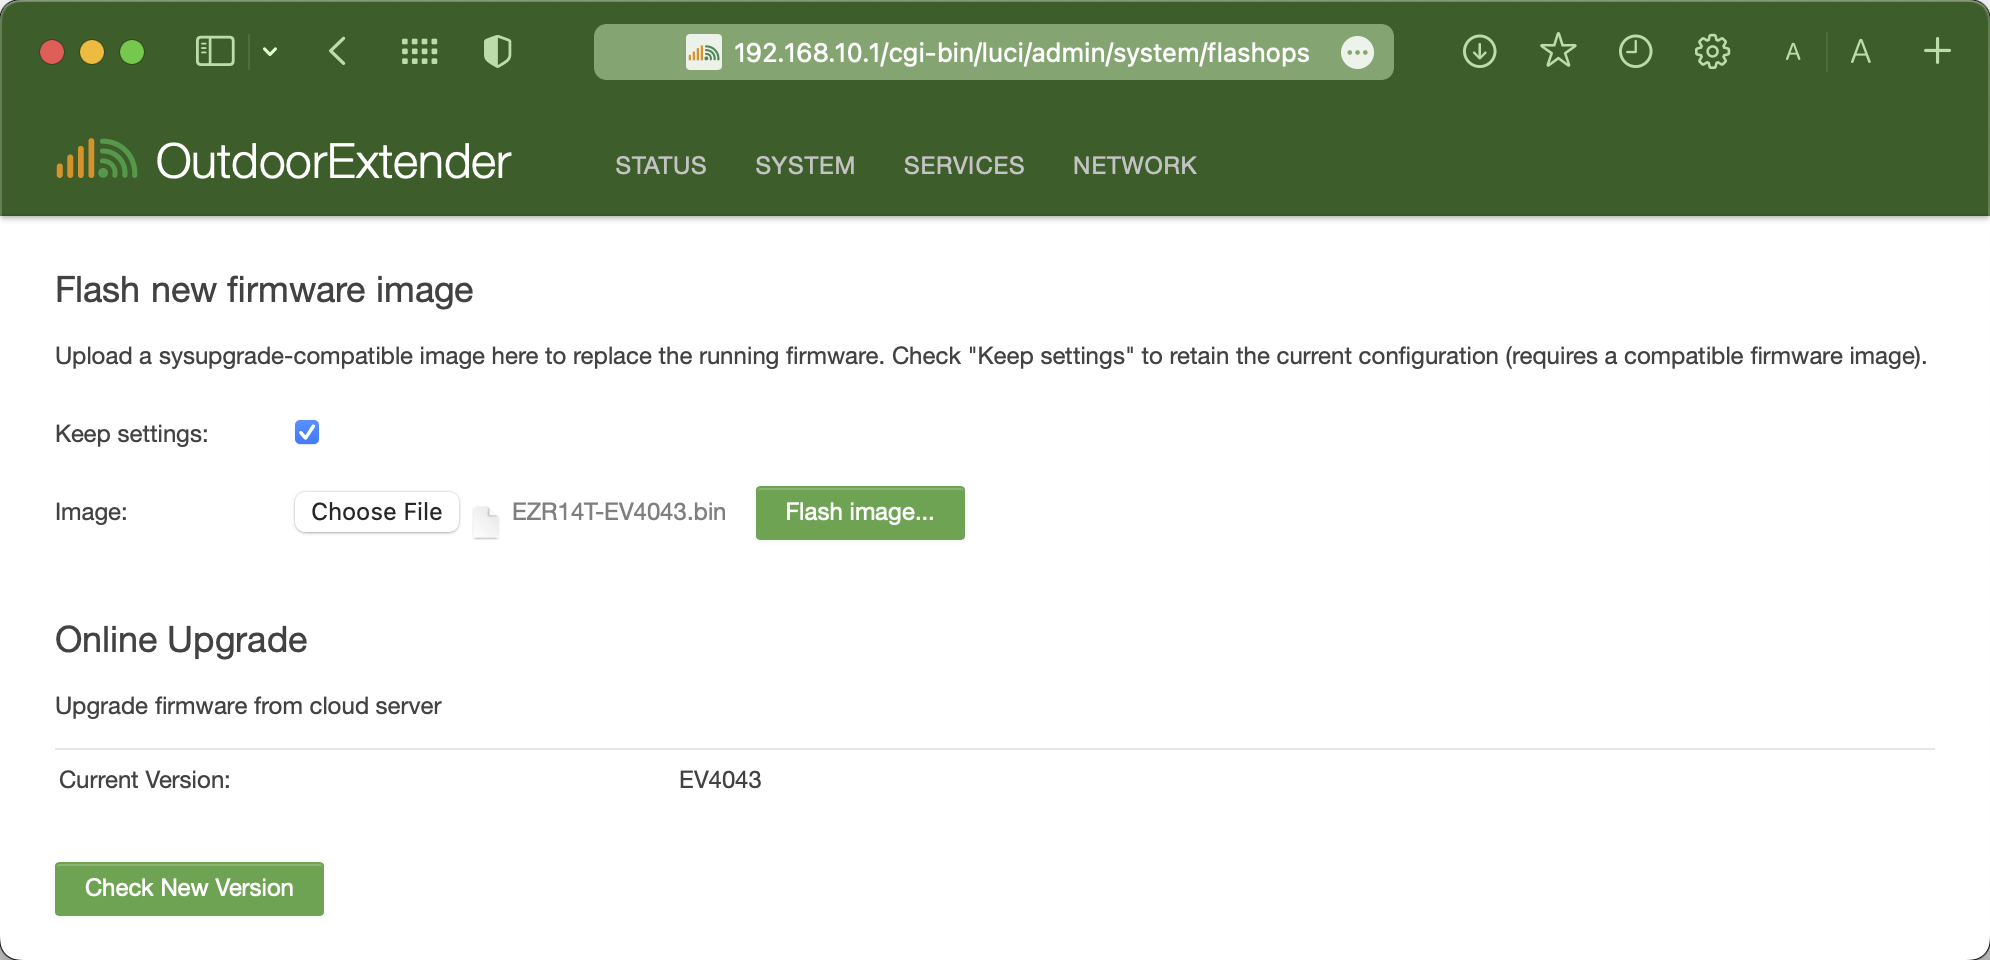
To flash the firmware, navigate to ***"System > Backup / Flash Firmware"*** after accessing the admin panel of the extender.
{% hint style="info" %}
**Keep Settings**
Enabling the **"Keep Settings"** checkbox will run a standard upgrade that automatically preserves many configurations, such as network settings, WiFi settings, the device hostname, etc.
Unselecting the **"Keep Settings"** checkbox will replace all configurations with factory default settings and not automatically jump back.
{% endhint %}
* Locate the section starting with **"Flash new firmware image"**;
* Click the "Choose File" button and select the firmware file from your computer;
*\*The firmware file usually ends with **\*.bin**.*
* Click **"Flash Image"** to upload the firmware file;
* Verify firmware image checksum and proceed;
* The system indicator flashes while flashing the firmware;
* Wait 3\~5 minutes until the extender comes back online.
You must re-access the extender admin at or a customized LAN IP address.
{% hint style="danger" %}
Do not turn off the power or disconnect from the PoE injector while flashing the firmware.
{% endhint %}
### Online Upgrade
You can also upgrade the firmware from the cloud server. This upgrade method will keep all the custom configurations.
Navigate to ***"System > Backup / Flash Firmware"*** after accessing the admin panel.
1. Scroll down and locate the section starting with ***"Online Upgrade"***;
2. Click the **"Check New Version"** button;
3. It will start to check the upgraded firmware;
* If have a newer version, you can choose to download the latest version to the extender's temporary memory space;
* If have not a newer version, the return message will be *"No updated version available"*.
4. It will automatically run a standard upgrade and keep the previous configurations;
5. Wait 3\~5 minutes until the extender comes back online.