> For the complete documentation index, see [llms.txt](https://extender.router.works/llms.txt). Markdown versions of documentation pages are available by appending `.md` to page URLs; this page is available as [Markdown](https://extender.router.works/ezr13t/firmware/wifi-hotspots.md).
# WiFi Hotspots
Both Wi-Fi hotspots with SSID of "Extender-WiFi-xxxx" are turned on by default and non-encrypted.
## Wireless Overview
After accessing the router admin panel, go to ***"Network > Wireless"*** to the wireless overview page.
* **radio0 - Generic MAC80211 802.11bgn** is the 2.4GHz WiFi AP\
SSID: Extender-WiFi-xxxxxx is the main hotspot\
SSID: Guest-WiFi-xxxxxx is the Guest hotspot
* **SSID | Mode: Client** -- is the Wi-Fi relay connection. \
It's not visible before setting up a Wi-Fi relay.
* **Associated Stations** are the active Wi-Fi networks and their working status.
You can turn off both client and master SSID by clicking the *"**Disable**"* button and re-activate it by clicking the *"**Enable**"* button.
WiFi Extender - Wireless Overview Panel
***
## Edit WiFi Hotspots
On the above wireless overview page, click the ***"Edit"*** button on the row of related WiFi SSID to enter their configuration page.
**Cellular-WiFi-xxxxxx** is the main WiFi hotspot.\
**Guest-WiFi-xxxxxx** is the Guest WiFi hotspot isolated in a separate subnet.
*Note: "xxxxxx" indicates the MAC address of the WiFi AP module.*
### General
In the General Setup tab, you can monitor the network status and configure Wi-Fi operating mode, channel, bandwidth, and transmit power. Suggest using default settings unless there is a conflict.
* **Operating Mode** - Leave 802.11n standard (N mode) as default for maximum compatibility.
* **Channel** - Use the default Auto channel selection to let the router choose an unused channel. Or, if setting a manual channel, choose a lower channel <11 to ensure legacy device compatibility after setting the country code.
* **Operating Width** - Default 20MHz width instead of 40MHz helps avoid interference in dense WiFi environments.
* **Transmit Power** - Leave it in "Auto" mode to let the router adjust within regulatory limits. The max transmit power may be restricted below 21dBm depending on the country code for legal compliance.
General Settings of Master Main WiFi Hotspot
### Country Code
In **Device Configuration**, click the **Advanced Settings** tab, check the Country Code field, and select the corresponding country code.
It is essential to ensure the WiFi hotspot on your router meets the legal regulations in your country. The other configured WiFi networks will use the same device settings.
* **Country Code** - Select the appropriate country to ensure WiFi operates on legal frequencies and power levels.
* **Fragmentation Threshold** - Packet size before link layer fragmentation. Lower settings can help noisy links. 2346 bytes is generally recommended.
* **RTS/CTS Threshold** - Frame size threshold for RTS/CTS handshake. 2347 bytes is typically optimal.
* **Beacon Interval** - Configure the packet broadcast frequency. Lower times increase roaming support at the cost of throughput. Default 100ms is recommended.
Advanced Settings of WiFi Hotspot on the Extender
### WiFi SSID
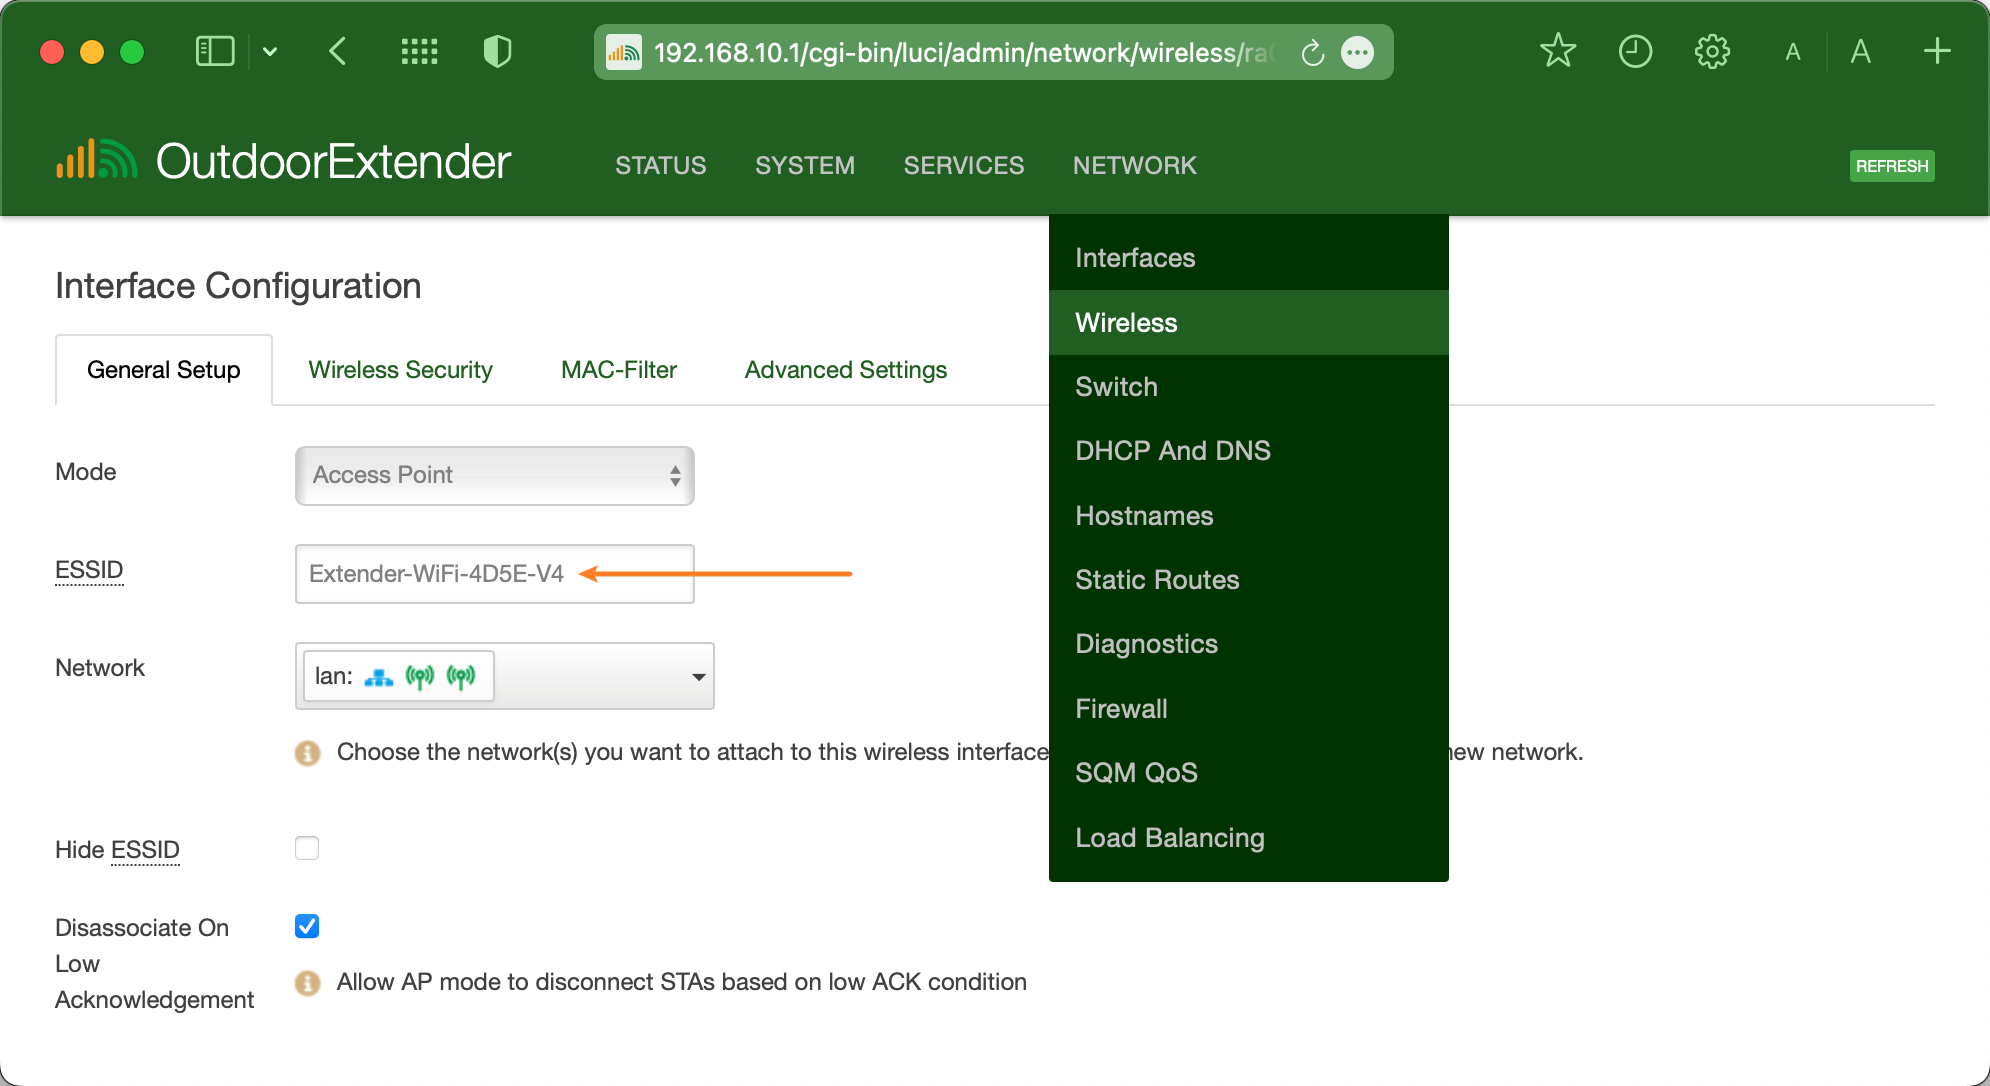
In the **Interface Configuration** section, click the **General Setup** tab. You can edit the WiFi hotspot name on the **ESSID** field.
Enable the checkbox of **Hide ESSID** to stop broadcasting the Wi-Fi hotspot but maintain the Wi-Fi connection. You should manually input the WiFI SSID and password to connect a new device when the ESSID is hidden.
* **Mode** - Leave as Access Point
* **ESSID** - Enter the WiFi hotspot name (SSID) for the WiFi hotspot. It is recommended not to include spaces or special characters.
* **Network** - Leave as the default LAN network
* **Hide ESSID** - Enable this option to disable SSID broadcast.
* **WMM Mode** - WiFi Multimedia is an automated way of handling Quality of Service (QoS). Turn it off for more compatibility with legacy WiFi devices.
### WiFi Password
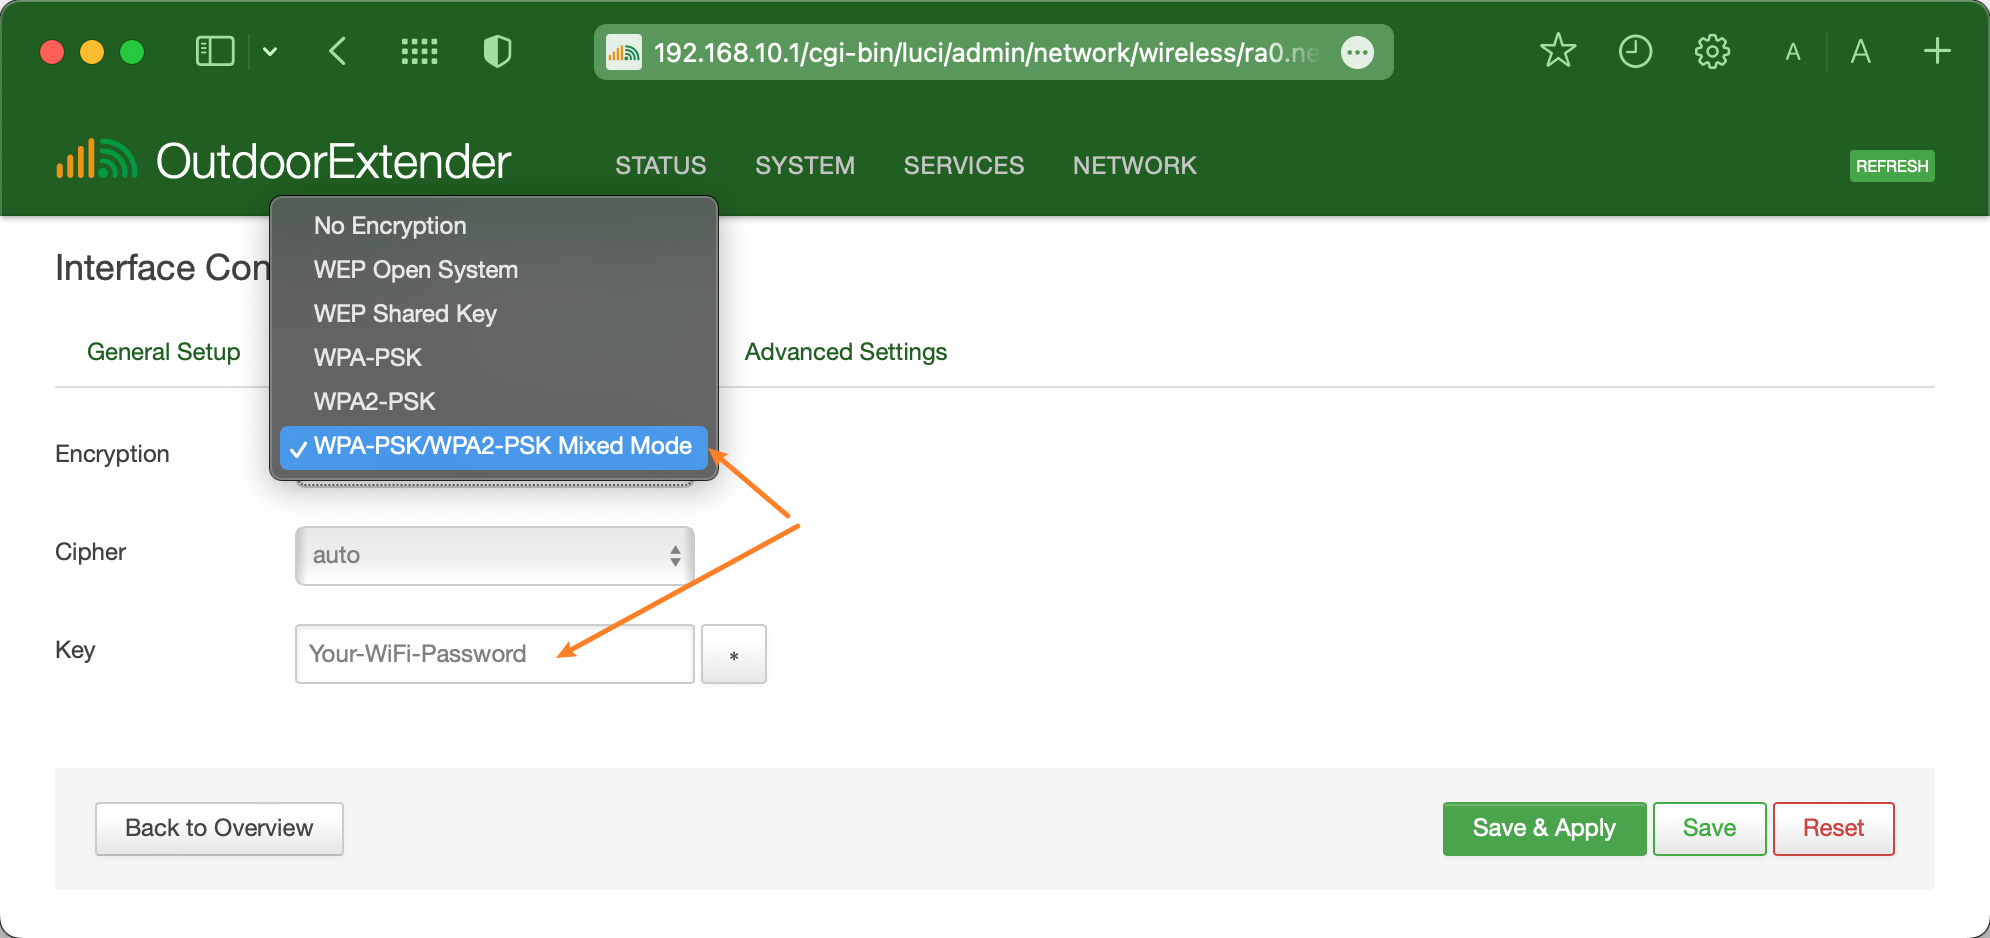
Click the **Wireless Security** tab to customize the WiFi password in the **Interface Configuration** section.
* **Encryption** - Select the encryption method. Using "WPA2-PSK" or "Mixed WPA/WPA2" encryption with a strong password is highly recommended to prevent unauthorized access.
* **Cipher** - The recommended default is "Auto."
* **Key** - Enter and confirm a password (at least eight characters) that clients will use to connect. Do not leave this option empty after choosing the "Encryption" method above.
Click the ***"Save & Apply"*** button after customizing WiFi settings, and it will take 2\~3 minutes to reboot the WiFi hotspot. Then, use the new WiFi password to re-connect to the new WiFi hotspot name.